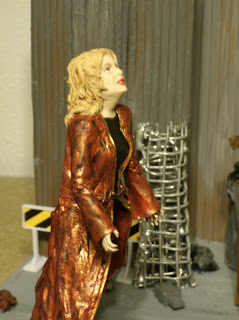
 For Glory I sculpted the underside of her chin. I cut away some of the back of her head so her head could tilt back more. I wanted her looking up. I also sculpted over the leg joints and make her pants a bit more "real" looking. For the cloak I had to super glue random bits together to get it to be the correct size. The original cloak would have been wonderful but after watching the show I noticed the cloak went down to the ground so I had to add more on. I also chose to use the Vampire Willow hands since those fingers look like they are in pain, being somewhat curled. The hair took quite some time to get right. Once I figured out how to make curly hair it was pretty easy. I had to go piece by piece and then I used a tool to indent some lines. I really like how it turned out.


Here are some in progress pictures of Tara:


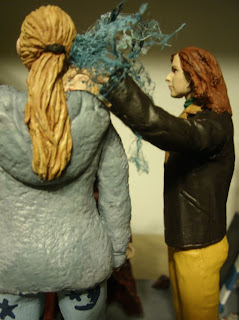
Willow was a tricky one to sculpt. I had to figure out where the hands had to be to make it look like she was plunging them into Glory and Tara's head and make it look as real as possible. I had to do this in many stages. Plus it was super tricky to sculpt around the arms in that position. I ended up cutting away some of the jacket so it looked more stretched since her arms are out reaching forward. I also saw that Willow had on high heels (luckily before I got much sculpted) so I traded her bottom legs for Darla's heeled legs. I then sculpted the jeans and gave her more of a bubble butt. I had to add some details on the jacket. I also sculpted the hair to be blowing back somewhat.


The Trio, in progress and finished sculpted pictures.


For the set I wanted to do something unique but not too busy to distract from the main event. I had a much smaller base but I had a hard time getting the pieces I wanted to use to fit. The only thing I had was a super large plastic base from something. I ended up cutting that into a smaller square. I then screwed down some of the plastic bases for the walls. I used foam board for some of the walls also. The is a window piece from the charmed set, a fence, garbage can, rat eating from a Chinese container, pallet and wood scraps, roll of fence, and some other random bits that looked somewhat true to the original scene. I also used a sheet of Styrofoam (with lines scraped in it, and glued) for the back wall. I painted it to look rusty. I love how that turned out. The floor is painted with sand in it to give it a rough look. I also used foam board glued to the outer plastic base to cover the cut edges. Here is a picture from the show and my version (along with different angles to show all the details):


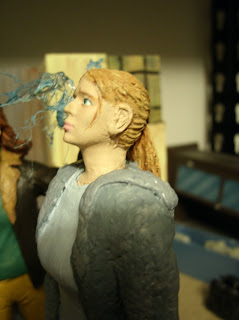
Painting Glory I knew would be a challenge. At first I thought her cloak had black marks on it but in other scenes it was just shadows. Her cloak is very shiny. I had bought some copper paint and I mixed that with red and it gave me a wonderful, perfect color. I mixed in some gold paint as well and just painted the outer cloak with swirls of many colors. The hair was quite unique as well. I started out with some darker shades and I was going to add in some highlights but it didn't work quite right. I kept adding colors and blending in spots and somehow it came out looking very natural and true to Glory's hair color. I doubt you can see all the texture in the pictures but I do like how it turned out. I'm not totally satisfied with her face but for the most part it looks like her (I think the thing that bugs me is her chin/neck area which seems to be huge). Here are some pictures.


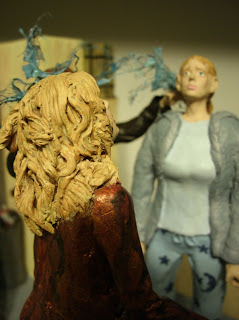
Tara gave me some troubles as well. Painting the sweater and shirt was easy. The design on her pants was not easy. I had it done at one point but noticed I did the moon wrong so I had to repaint the pants. Then I tried using a marker to draw on the moons/stars. This wasn't as effective. So my third attempt is what you see. I do like how her face turned out. She lookes shocked and confused so that was what I was going for. Here is a picture from the show and my version:


Willow was the last to get painted. It was hard mixing paint to match her crazy clothes! I really like how it all came together.


Here are pictures of all three figures on the base. I painted some spider webs (that you may use during halloween) first with glue to harden the fabric, then I painted it with shades of blue. I think it makes a nice effect for the magic spell that is happening:


Here you can see the details in Glory's hair.


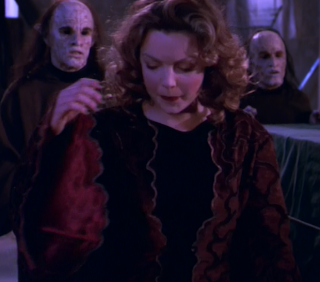
Here is a picture from the show where I got my inspiration from. And then I tried to mimic that picture with my figures.


