Saturday, April 3, 2010

Season 6, Episode 2: Bargaining: Part 2


Original Air Date: 2 October 2001
As a gang of demon bikers attack, the Scooby Gang is chased away from Buffy's grave thinking that the resurrection was a failure. They do not realize that the Slayer is alive... right where they left her. Buffy is awake but disoriented and afraid as she must claw her way out of her own grave. Buffy may be alive again, but the trauma she suffers is far from over.
The idea for this piece came when found a coffin while junk shopping. I couldn't believe how perfect to scale it is to the 6 inch figures. My idea was this. I wanted to create Buffy when her friends bring her back to life. This figure has been made a few times by other customizers, so I had to put a different spin on it. My thought was to make Buffy coming out of the ground and have the coffin busted open and made to look like it is underground.

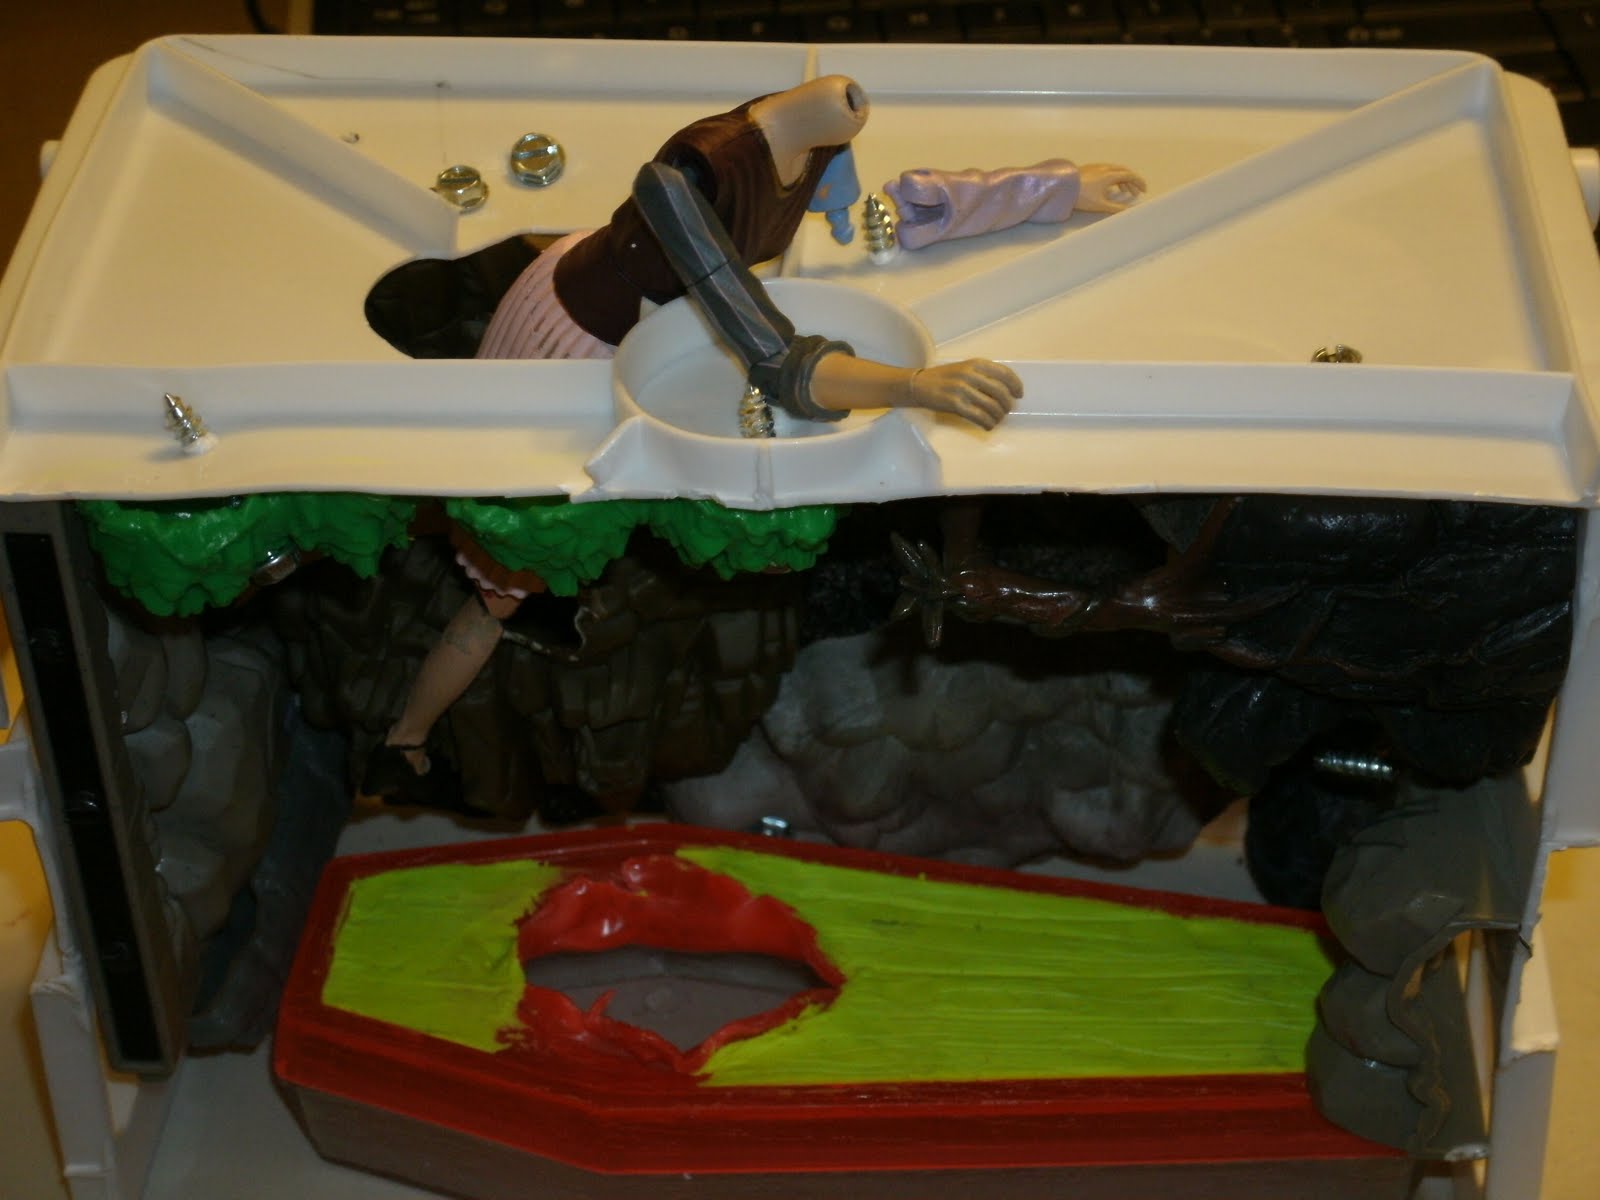
I was eager to get this project started. I first had to find a box to put the underground pieces in. A regular box would not work because it would warp. I had a few plastic shoe boxes but I wanted something more boxy. I finally found a small plastic crate. I over turned the crate so the bottom would serve as the top. I had to cut off one of the sides and some of the ends so it wasn't so deep. That was not easy to do! The fun part was going through all my scrap junk parts and seeing what I could use for the underground. After finding many scrap bits I screwed them inside the box. There were a lot of gaps in between pieces so I also had some old FEMO clay that I broke into rock-ish chunks, boiled the pieces, then hot glued them throughout the inside of the box. Here are some pictures.

With coffin:

Without coffin and with all the pieces screwed in place.

Here are some pictures of the broken chunks of clay. The coffin is in the pictures as well. I used my heat gun to soften the plastic (it is made from really hard plastic--like CD case plastic). Then I used some clay to sculpt over the top where it said the name of the game that used to be inside the coffin.

Here is a picture of the top of the box. I also had to use the heat gun to soften the plastic enough to cut a hole in the top.

For Buffy, I was originally going to use mostly a Buffy bot body with a OMWF Buffy head. That didn't work since her shoes in the show were high heels. There were two figures I could have used. Princess Cordy, or OMWF Anya. Since the shoes were closed--no toes, I opted to use Anya's legs. These things were dang hard to detach from the skirt. I ended up cutting them out! Since I lost some of the length in the leg, I cut up part of an Angel arm (since you can't really use those arms with him holding the stakes for anything else.) I then attached that to the knee area of a Buffy Bot bottom. I decided to sculpt over the dress to save clay. I also decided to use Gift Dawn torso since her top looked like Buffy's dress (and 1 arm from Gift Dawn with a different Dawn shoulder part) . I used a YW Cordy arm for the other side. And the OMWF Buffy head. Here was my Frankenstein.

I didn't notice that she looked too long in the leg area. I even stood her up against another figure just to check for proportion. See if you can notice something with her length (that is if you didn't notice it from the earlier pictures)....


A good friend who also makes custom figures, Nathalie, pointed out to me that she looks way to long. After really looking at it, she was right. I'm not sure how or why. I sadly had to rip off all the cay (but I did end up using it for scrap dirt chunks in the display). I decided to cut off the Buffy Bot dress, and I cut down some of the legs. Once I got a new dress sculpted it looked much better.
Here are pictures of the underground, painted and the newly sculpted Buffy.


The next thing I did was cover the outside of the crate with foam board. I also covered the front part with foam board because you can see gaps where the pieces didn't fill in. I had a lot of fun painting this part of the set. I mixed sand and tiny chunks of broken clay in with paint. I also mixed in some green spongy plant stuff. I only used this to paint the outside to make it look like the underground. I just used plain paint for the inside of the box. You will see in later pictures the outside of the box. I also had to use the foam board to cover the top. There were ridges in the "top" part of the crate and I didn't want to use pounds and pounds of clay filling in the gaps to make the grass (look back at earlier pictures of the gaps on the top of the crate). So I painfully cut out pieces to fit inside the gaps. Then I covered that all with a lot of Premo sculpy clay. (Thank you Nancy Hagen for all the clay you gave me--was that your way of saying you now want a personalized figure of yourself?!?!) Here are some pictures of the top:


The next step was to sculpt Buffy. She was relatively easy to do. The hair was a little tricky. I tried to make it fan a little forward since she's leaning a bit, but that wasn't working how I wanted it to. I think the hardest part was getting her in the position I wanted, glue some rocks where her feet should go, then get the arms positioned correctly. Luckily (but barely) she could slid in and out of the hole so I could paint her and make any minor changes.
Here is Buffy, nearly sculpted.


For the casket I wanted it to look more authentic. I used a long piece of plastic for the bar for carrying the casket. Then to make the hinges I used 3 Cordelia bags and cut off the shoulder straps. I used the part closest to where it connected to the bag. I also used two double blade axes and used each blade for the spot where the hinge attach. Here is the picture I used to help guide me with making this:
Here are my before and after pics:


I did take a piece of white fabric and glued it into ridges. Then I glued that inside the casket. I cut some of it away to make it look like Buffy ripped it. There is dirt on top of the casket and inside since she had to dig her way out.
I did also have a board I used for the bottom. I glued clay to it and painted it. and it is hot glued to the crate. Here are some pictures with Buffy not yet painted:


Painting Buffy was easy. I tried to give her an expression of worry and shock. I think the figure looks much better in person than in pictures. I just couldn't get a good picture! I had a hell of a time painting what was on her grave stone. My brush wasn't cutting it and I didn't have a paint pen. So I did end up painting with the brush, but it's a sloppy job. You can make out some words, but really, it's an unimportant detail.
Anyway, here are the rest of the pictures! Oh, I did realize that I didn't paint blood on her hands so I did fix that!

Wednesday, March 31, 2010

Cemetery/Graveyard Playset--(no figures yet)

When I first started collecting Buffy action figures I wanted to have a graveyard as part of my set since that was a huge scene for the first few seasons. I started off with the huge plastic clumps of grass that came with Moore Buffy figures. I used felt for the grass. I knew I didn't like this since it looked so fake and unauthentic. Over the next two years I collected parts and pieces that I could possibly use in a graveyard. I had trees, walls, steps, benches, plants and the grave stones that came with the figures.

Here are some pictures of the early cemetery. These are old pictures!!


I then ditched the whole scene when I found some fake grass they use with train sets. Normally it's expensive and I would have not gotten it, but I found it at the place where I find most of my junk and scrap parts for my sets. Then I started finding more and more things and soon the cemetery started coming to life. I knew I wanted a fountain of some kind in my cemetery. I think fountains are aesthetically pleasing to look at. So this was the actual first thing I made for my new playset.

Here is what I used. For the bottom I used the bottom of a yogurt container and the top rim. I turned the rim over and glued it to the inside of the bottom of the container. (You can see what I mean in the picture). I then had a plastic (maybe Barbie??) bucket. I over turned that and screwed it to a turned over what looks like a rock pile and a huge wooden spool. Clay normally won't stick to wood and when it gets wet it expands. It somehow worked enough and the cracks add to the "aged effect." To that I had a scrap piece from a Stargate figure. I then sculpted over another screw to make a little stand. To that I attached another scrap part from I think a Stargate figure. I boiled this in pieces (but not the very bottom part or it would ruin the plastic). Then I glued them together. I had some old junk clay which I broke and I boiled the pieces and then glued them onto the bottom of the container to make it look like rocks. It looked very cool. Here are some before pictures:


Finished (with flash and without)
This was sort of my inspiration picture.

This (and all the other parts) sat staring at me for the longest time. I knew it was going to be tedious painting all these parts. What's another "FEW" months when it's been on my list to do for years? Now that I'm on break, I had no excuse to leave it sit.


Here are some before pictures of the cemetery:

In this picture(s) I used 4 plastic wall pieces. I don't know where they came from (what action figure--there is no label on it.) There is a fake pine tree, a wooden bench and some small wooden trees (that were in that green circle), there is a Barbie shrub in a planter. You can see two Harry Potter pieces--I ended up gluing them together and then gluing that on top of a Buffy grave piece. The steps in the back I'm not sure where they came from. I also found these neat plants in a pot. The sidewalk is cardboard but I ended up using a sheet of cork to give it that concrete look. There is also a water pump.
In this picture(s) I found these two Church statues. One is Jesus and the other is a monk, I think. I thought they would be perfect in a cemetery. The larger monk I mounted on a couple of graves and Jesus I mounted on the green disk with one of the crosses you get with Spike. There is another bench, a cool, creepy tree that I don't know where it came from and some grave pieces. I collected MANY fence pieces and painfully glued them together. I found a tree top and glued that to a chess piece. I used some other chess pieces as graves (not pictured).
I really didn't sculpt a whole lot with the graves. I had to cut off the flower parts and the vines that were on the side. I like the rough look it left when I cut off that stuff so there was no need to sculpt over it and make it smooth. I did sculpt on the bumps at the bottom of the huge monk grave. I did that because of this grave I saw:
I started painting one of the graves and I tried to blend in some other paint while it was wet and it just didn't have any "depth" to it. On a whim, not sure what told me to try it, but I painted my first grave dark gray. Once it dried I used a lighter gray and with a little on the brush I swept it over the grave shown below. It worked out brilliantly!! It hit the high parts and left the low parts dark. I was truly blown away at how it looked like real stone!! Check it out! (In real life it looks so much better, it's hard to capture the coolness on camera.)
Once I finished that piece I got a bit obsessive and I did the entire graveyard in this way. Everything has a stone look to it. Here are some more close ups and the completed playset:

Left side

Through the eyes of a hidden vampire...
Middle

Right side
This wall had bricks in it so I had to go back and paint in the bricks. I did it the first time in my old set, but I make it look more real this time with different colored bricks.
The whole playset. I want to make a Buffy figure with a vampire to put in the cemetery, so it's not so empty. That will be coming sometime....